Small Tip

Small Tip: How to use AWS CLI ‘–filter’ parameter

2015/01/20 AWS, DevOps, Operations, Small Tip 5 comments , , , , , ,

This post will present another, useful feature of the AWS CLI tool set, the –filter parameter. This command line parameter is available and extremely helpful in EC2 namespace (aws ec2 describe-*).There are various ways to use –filter parameter.

1. –filter parameter can get filtering properties directly from the command line:

2. –filter parameter will also use JSON-encoded filter file:

The filters.json file uses the following structure:

There are various AWS CLI components that provide –filter parameters. For additional information check the References section.

To demonstrate the way this functionality can be used in various scenarios, there are several examples:

1. Filter by availability zone:

2. Filter by security group (EC2-Classic):

3. Filter by security group (EC2-VPC):

4. Filter only spot instances

5. Filter only running EC2 instances:

6. Filter only stopped EC2 instances:

7. Filter by SSH Key name

8. Filter by Tag:

9. Filter by Tag with a wildcard (‘*’):

10. Filter by multiple criteria (all running instances with string ’email’ in the value of the Name tag):

11. Filter by multiple criteria (all running instances with empty Name tag);

Those examples are very close to production ones used in several large AWS deployments. They are used to:

  • Monitor changes in instance populations;
  • Monitor successful configuration of resources;
  • Track deployment / rollout of new software version;
  • Track stopped instances to prevent unnecessary resource usage;
  • Ensure desired service distributions over availability zones and regions;
  • Ensure service distribution over instances with different lifecycle;

Be sure to utilize this functionality in your monitoring infrastructure. It has been powerful source of operational insights and great source of raw data for our intelligent control planes!

If you want to talk more on this subject or just share your experience, do not hesitate to Contact Us!

References

Small Tip: How to use –block-device-mappings to manage instance volumes with AWS CLI

2014/11/26 AWS, Development, DevOps, Operations, Small Tip , , , , ,

This post will present one of the less popular features in the AWS CLI tool set, how to deal with EC2 instance volumes through the use of –block-device-mappings parameter. Previous post, Small Tip: Use AWS CLI to create instances with bigger root partitions already presents one of the common use cases, modifying the instance root partition size. However, use of ‘–block-device-mappings’ can go far beyond this simple feature.

Default documentation (http://docs.aws.amazon.com/cli/latest/reference/ec2/run-instances.html) although a good start is somewhat limited. Several tips and tricks will be presented here.

The location of the JSON block device mapping specification can be quite flexible. The mappings can be supplied:

1. Using command line directly:

2. Using file as a source:

3. Using URL as a source:

Source: http://understeer.hatenablog.com/entry/2013/10/18/223618

Other common scenarios:

1. To reorder default ephemeral volumes to ensure stability of the environment:

NOTE: Useful for additional UserData processing or deployments with hardcoded settings.

2. To allocate additional EBS Volume with specific size (100GB), to be associated with the EC2 instance:

NOTE: Useful for cases where cheaper instance types are outfitted with big volumes (Disk intensive tasks run on low-CPU/MEM instance types).

3. To allocate new volume from Snapshot ID:

NOTE: Useful to pre-loading newly created instances with specific disk data and still retaining the ability to modify the local copy.

4. To omit mapping of a particular Device Name:

NOTE: Useful to overwrite default AWS behavior.

5. To allocate new EBS Volume with explicit termination behavior (Keep after instance termination):

NOTE: Useful to keep instance data after termination, additional cost may be significant if those volumes are not released after examination.

6. To allocate new, encrypted, EBS Volume with Reserved IOPS:

NOTE: Useful to set minimum required performance levels (I/O Operations Per Second) for the specified volume.

Outlined functionality should cover wide range of potentially use cases for DevOps engineers who want to use automation to customize their infrastructure. Flexible instance volume management is a key ingredient for successful implementation of the ‘Infrastructure-as-Code’ paradigm!

References

Small Tip: How to use AWS CLI to start Spot instances with UserData

2014/07/12 AWS, DevOps, Operations, Small Tip , , , ,

Common occurrence in the list of daily DevOps tasks is the one to deal with AWS EC2 Spot Instances. They offer the same performance, as the OnDemand counterparts, they are cheap to the extend that user can specify the hourly price. The drawback is that AWS can reclaim them if the market price goes beyond the user’s price. Still, those are key component, a basic building block, in every modern elastic system. As such, DevOps engineers must regularly interact with those.

AWS provides proper command line interface, aws ec2 request-spot-instances exposes multiple options to the user. However, some of the common use cases are not comprehensively covered in the documentation. For example, creating Spot Instances with Userdata using the command line tools is somewhat obscure and convoluted, although common need in DevOps and Developers lives. The tricky part: It must be BASE64 encoded!

Assume the following, simple UserData script, must be deployed on numerous EC2 Spot Instances:

Make sure base64 command is available in your system, or use equivalent, to encode the sample userdata.sh file before passing to the launch specification:

In this example two spot instance requests will be created for m3.medim instances, using ami-a6926dce AMI, test-key SSH key, running in test-sg Security Group. BASE64-encoded contents of userdata.sh will be attached to the request so upon fulfillment the Userdata will be passed to the newly created instances and executed after boot-up.

Spot instance requests will be created in the AWS EC2 Dashboard:

Screen Shot 2014-07-12 at 9.11.20 PM

Once the Spot Instance Requests (SIRs) are fulfilled, InstanceID will be associated for each SIR:

Screen Shot 2014-07-12 at 9.18.24 PM

EC2 Instances dashboard will show newly created Spot Instances (notice the “Lifecycle: spot” in Instance details):

Screen Shot 2014-07-12 at 9.20.30 PM

Using the proper credentials, one can verify successful execution of the userdata.sh on each instance:

… and more importantly, if the configured service works as expected:

Newly created Spot Instances are serving traffic, running at 0.01 USD/hr and will happily do so until the market price for this instance type goes above the specified price!

References

Small Tip: AWS announces T2 instance types

2014/07/04 AWS, Development, DevOps, Operations, Small Tip , , , , , , ,

One of the oldest and probably one of the most popular instance types, the t1.micro was recently upgraded by AWS. Three new instance types were introduced to fill the gap between t1.micro and the current-next, m3.medium. The new generation is called T2, uses only HVM based virtualization and comes with EBS only store support. There are three new instance types:

  1. t2.micro
  2. t2.small
  3. t2.medium

Those instance types are all “Burstable Performance Instances” which means they are suitable for unsustained loads. This is also supported by the EBS Only store, which effectively means that high-volume I/O is out of the question. The fact that those instances are all using HVM-based virtualization, however, supports quick SCALE-UP to more potent instance types, if needs arise. One notable remark here is that T2 instances are VPC-only, which is a strong indication of the will to move everything into VPCs nowadays. AWS wants you to start using VPCs from the start!

The instance resource matrix now looks like this:

Instance Type Virtualization Type CPU Cores Memory Storage
t1.micro PV 1 0.613 GB EBS Only
t2.micro HVM 1 1 GB EBS Only
m1.small PV 1 1.7 GB EBS Only
t2.small HVM 1 2 GB EBS Only
m3.medium HVM 1 3.75 GB EBS + SSD
t2.medium HVM 2 4 GB EBS Only

As stated by AWS, the target uses for the new, T2 instance type family, includes:

  • Development environments;
  • Private experimentation;
  • Educational use;
  • Build servers / Code repositories;
  • Low-traffic web applications;
  • Small databases.

To evaluate the meaning of “Burstable Performance Instances“, here are CPU benchmark results on several instance instance types:

Instance Type DES crypts/s MD5 crypts/s Blowfish crypts/s Generic crypts/s
t1.micro ~ 2 407 000 ~ 6 869 ~ 442 ~ 187 257
t2.micro ~ 4 757 000 ~ 14 164 ~ 851 ~ 344 928
m1.small ~ 1 218 000 ~ 3 480 ~ 222 ~ 92 870
t2.small ~ 4 993 000 ~ 14 245 ~ 854 ~ 347 961
m3.medium ~ 2 272 000 ~ 6 429 ~ 386 ~ 158 342
t2.medium ~ 5 045 000 ~ 14 592 ~ 878 ~ 356 544

All instances use detault settings for storage, Amazon Linux AMI 2014.03.2, John The Ripper 1.8.0, measuring real crypts with many salts! The test is fairly synthetic, but answers the key question: What difference does it make to have a Burstable instance type? And the answer: If CPU load is not sustainable, it’s more than twice as fast!

Price-wise the new instance types are also better. Cost reduction of On Demand prices of more than 35% allows you to run t2.micro for less than 10 USD/m! Watch out, DigitalOcean! Obviously, Amazon wants change the already established “AWS for business, DigitalOcean for home” mantra into “AWS Everywhere”.

In conclusion, the new, T2 instance type family, closes the gap between unacceptably low performance instance type (t1.micro) and too expensive instances types (m1.small, m3.medium) which creates the sweet-spot for entry users, cloud enthusiast and home users. As someone said: “Now you have an instance type to run WordPress on!”

Small Tip: How to run non-deamon()-ized processes in the background with SupervisorD

2014/06/26 Development, DevOps, Operations, Small Tip , , , , , , , ,

The following article will demonstrate how to use Ubuntu 14.04 LTS and SupervisorD to manage the not-so-uncommon case of long running services that expect to be running in active console / terminal. Those are usually quickly / badly written pieces of code that do not use daemon(), or equivalent function, to properly go into background but instead run forever in the foreground. Over the years multiple solutions emerged, including quite the ugly ones (nohup … 2>&1 logfile &). Luckily, there is a better one, and it’s called SupervisorD. With Ubuntu 14.04 LTS it even comes as a package and it should be part of your DevOps arsenal of tools!

In a typical Python / Web-scale environment multiple components will be implemented in a de-coupled, micro-services, REST-based architecture. One of the popular frameworks for REST is Bottle. And there are multiple approaches to build services with Bottle when full-blown HTTP Server is available (Apache, NginX, etc.) or if performance matters. All of those are valid and somewhat documented. But still, there is the case (and it more common than one would think) when developer will create Bottle server to handle simple task and it will propagate into production, using ugly solution like Screen/TMUX or even nohup. Here is a way to put this under proper control.

Test Server code: test-server.py

Test server configuration file: test-server.conf

Manual execution of the server code will looks like this:

When the controlling terminal is lost the server will be terminated. Obviously, this is neither acceptable, nor desirable behavior.

With SupervisorD (sudo aptitude install supervisor) the service can be properly managed using simple configuration file.

Example SupervisorD configuration file: /etc/supervisor/conf.d/test-server.conf

To start the service, execute:

To verify successful service start:

SupervisorD will redirect stdout and stderr to properly named log files:

Those log files can be integrated with a centralized logging architecture or processed for error / anomaly detection separately.

SupervisorD also comes with handy, command-line control utility, supervisorctl:

With some additional effort SupervisorD can react to various types of events (http://supervisord.org/events.html) which bring it one step closer to full process monitoring & notification solution!

References

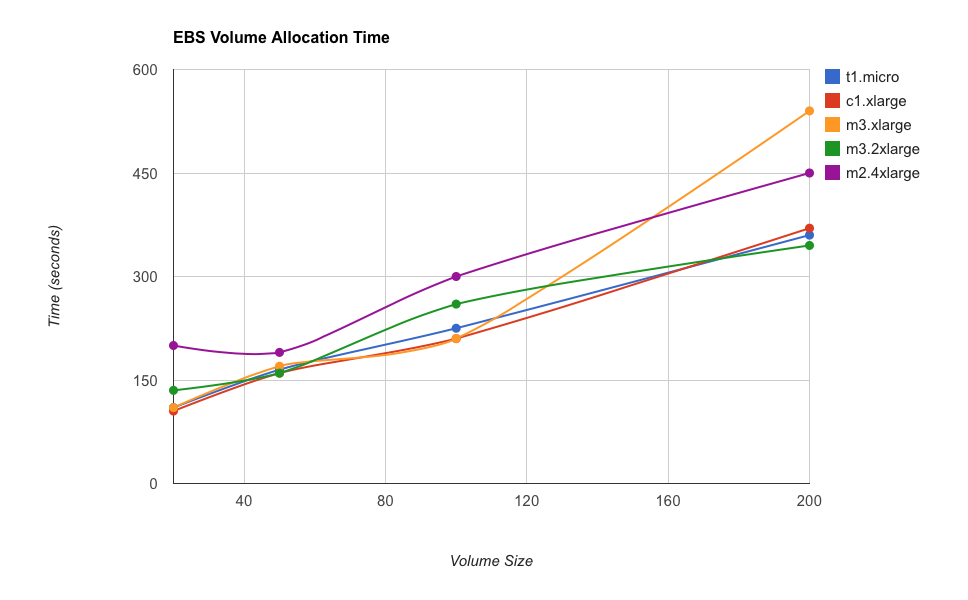
Small Tip: EBS volume allocation time is linear to the size and unrelated to the instance type

2014/06/23 AWS, DevOps, Operations, Small Tip , , , , ,

Due to fluctuations in startup times for instances in AWS, it was speculated that allocation of EBS volumes may be the reason for the nondeterministic behavior. This led to an interesting discussion and finally to a small test to determine how volume size of an EBS volume allocated with an instance affect its startup time.

To gather some results the following script was created: https://s3-us-west-2.amazonaws.com/blog.xi-group.com/aws-ebs-allocation-times/aws-single.sh. It will create one instance of the specified type with N GB of Root EBS volume, wait for the instance to properly start and then terminate it. The time for the whole process is measured (e.g. full ‘time-to-service’).

The script was run multiple times for each instance type and EBS volume size. Results are presented in the following table:

t1.micro c1.xlarge m3.xlarge m3.2xlarge m2.4xlarge
20 GB ~ 1m 50s ~ 1m 45s ~ 1m 50s ~ 2m 15s ~ 3m 20s
50 GB ~ 2m 45s ~ 2m 40s ~ 2m 50s ~ 2m 40s ~ 3m 10s
100 GB ~ 3m 45s ~ 3m 30s ~ 3m 30s ~ 4m 20s ~ 5m 00s
200 GB ~ 6m 00s ~ 6m 10s ~ 9m 00s ~ 5m 45s ~ 7m 30s

Graphical representation:
Screen Shot 2014-06-23 at 9.49.13 AM

As shown, instance start time grows linearly with the size of the EBS Root volume. Moral of the story:

The more EBS storage you allocate at boot, the slower the instance will start!

NOTE: The whole procedure is reasonably time consuming if you gather multiple data points (in this case, for each instance type / volume size the script was run 3 times and the average value is shown). It will cost money, since all EC2 allocations will be charged for at least an hour. The script, provided here is ‘AS IS’ and can be used as reference. Be sure to understand it and properly modify it before running it!

Small Tip: Partitioning disk drives from within UserData script

2014/06/11 AWS, DevOps, Small Tip 2 comments , , , , ,

In a recent upgrade to the new generation of instances we faced an interesting conundrum. Previous generations came with quite the amount of disk spaces. Usually instance stores are mounted on /mnt. And it is all good and working. The best part, one can leave the default settings for the first instance store and do anything with the second. And “anything” translated to enabling swap on the second instance store. With the new instance types, however the number (and the size) of the instance stores is reduced. It is SSD, but m2.4xlarge comes with 2 x 840 GB, while the equivalent in the last generation, r3.2xlarge, comes with only one 160 GB instance store partition.

Not a problem, just a challenge!

We prefer to use UserData for automatic server setup. After some attempts it became clear that partitioning disks from a shell script is not exactly trivial tasks under Linux in AWS. BSD-based operating systems come with disklabel and fdisk and those will do the job. Linux comes with fdisk by default and that tool is somewhat limited …

Luckily, fdisk reads data from stdin so quick-and-dirty solution quickly emerged!

The following UserData is used to modify the instance store of a m3.large instance, creating 8GB swap partition and re-mounting the rest as /mnt:

Execute it with AWS CLI (Using stock Ubuntu 14.04 HVM AMI):

The result:

There it is, 8GB swap partition (/dev/xvdb1) and the rest (/dev/xvdb2) mounted as /mnt. Note that /etc/fstab is also updated to account for the device name change!

Small Tip: Use AWS CLI to create instances with bigger root partitions

2014/06/05 AWS, DevOps, Small Tip 2 comments , , , , ,

On multiple occasions we had to deal with instances running out of disk space for the root file system. AWS provides you reasonable amount of storage, but most operating systems without additional settings will just use the root partition for everything. Which is usually sub-optimal, since default root partition is 8GB and you may have 160GB SSD just mounted on /mnt and never used. With the AWS Web interface, it is easy. Just create bigger root partitions for the instances. However, the AWS CLI solution is not obvious and somewhat hard to find. If you need to regularly start instances with non-standard root partitions, manual approach is not maintainable.

There is a solution. It lies in the –block-device-mappings parameter that can be passed to aws ec2 run-instances command.

According to the documentation this parameter uses JSON-encoded block device mapping to adjust different parameter of the instances that are being started. There is a simple example that shows how to attach additional volume:

This will attach additional 100GB EBS volume as /dev/sdb. The key part: “Ebs”: {“VolumeSize”: 100}

By specifying your instance’s root partition you can adjust the root partition size. Following is an example how to create Amazon Linux instance running on t1.micro with 32GB root partition:

The resulting volume details show the requested size and the fact that this is indeed root partition:
Screen Shot 2014-06-05 at 4.30.31 PM

Confirming, that the instance is operating on the proper volume:

There is enough space in the root partition now. Note: This is EBS volume, additional charges will apply!

References

  • aws ec2 run-instances help